
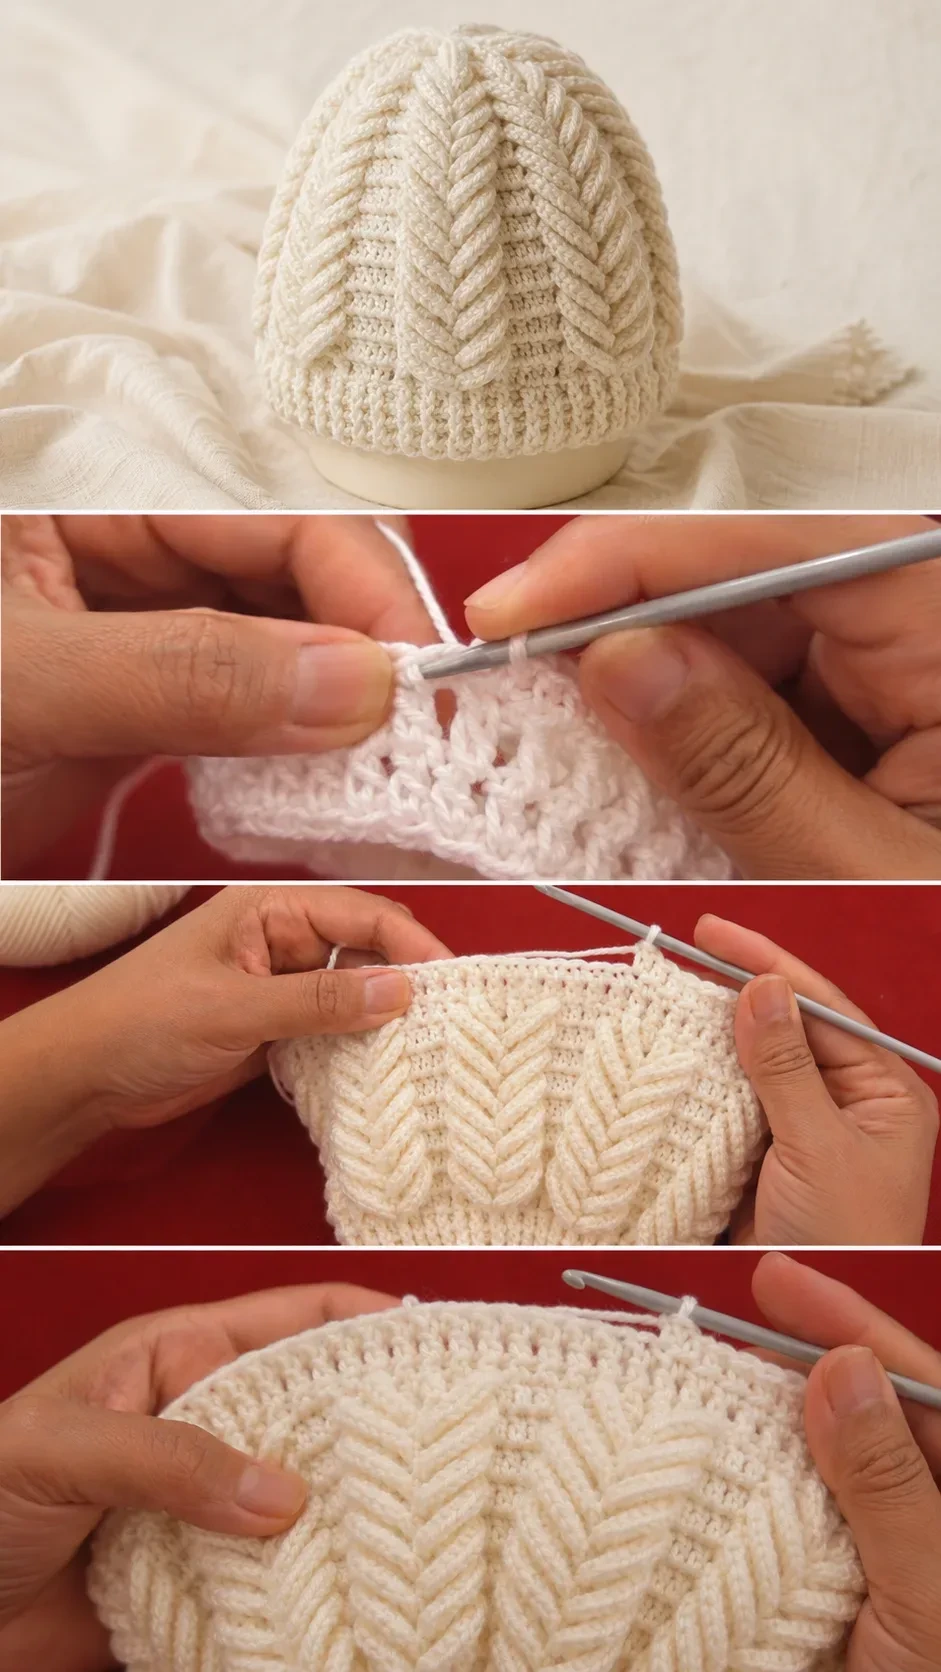
Some hats are simply warm. Others make people stop mid-sentence and reach out a hand to touch them before they even ask who made it. This wheat spike beanie belongs to the second group. Raised, interlocking spike stitches fan outward from a tidy ribbed brim like grain heads caught at harvest, converging at the crown into ridges that are airy yet structured — soft against the forehead, bold enough to read from across a winter market. It works for a small child and for yourself, and once the spike rhythm clicks, it crochets up almost on its own.
What you’ll need
- Worsted weight (#4) yarn — a smooth wool-blend or acrylic-wool mix gives the spike stitches the body they need to stand proud without going stiff (100–200 g for an adult hat)
- A 4.5 mm or 5 mm crochet hook, depending on your tension — swatch first, because the spike pattern pulls tighter than you expect
- Blunt-tipped yarn needle for weaving in ends
- Scissors and a tape measure
The Wheat Spike Beanie
 Save
1. The Classic Wheat Spike Beanie
The hat is worked in the round from the brim upward, so there are no seams to sew and no panels to align. A ribbed edge is established first in single crochet for a neat, fitted base, then the spike pattern is introduced in repeating sections that build around the full circumference. The defining stitch is an extended double crochet worked into a row below the current one — those long, sweeping drop-downs are what form the wheat ridges. Slip stitches join the rounds invisibly and manage the crown shaping, so the pattern flows without interruption. Because every motif repeat is consistent, the pattern is forgiving for beginners meeting spike stitches for the first time, and the video below walks through every step with generous close-up detail.
Sizing is simple: adjust the number of starting chains, or move the hook size by half a millimeter, to shift between a child and an adult fit. In cream or ivory the beanie looks pulled from a French countryside cottage, with every ridge catching the light — but dusty rose, slate blue, and oat heather let the texture breathe too, and a deep forest green or burgundy turns the same hat boldly seasonal. It pairs effortlessly over loose waves, tucked behind the ears, or pulled low over the brows on the coldest days.
Video tutorial: Wheat spike beanie video tutorial by tallermanualperu
Tip: spike stitches anchor into the rows below, so this hat crochets smaller than your gauge swatch suggests. Go up half a hook size if the brim feels snug, or add repeats before the crown shaping.
Caring for your wheat spike beanie
- Hand wash in cool water: Use a gentle wool-safe soap and press the water through the fabric rather than wringing, which can distort the raised ridges.
- Dry flat: Lay the hat on a clean towel, reshaping the crown gently with your hands so the spikes settle back into their natural positions as the yarn dries.
- Store loosely: Fold the hat loosely or place it over a rounded object rather than cramming it into a tight drawer, so the raised texture keeps its lift season after season.
- Sun awareness: Rich or dark colorways fade in direct sun, so store the hat away from bright windows between wears.
There is a reason this stitch keeps coming back every winter: it looks like it took forever, but once your hands find the rhythm of dropping down for each spike and returning to the current row, the work turns genuinely meditative — the kind of repetitive motion that settles the mind while the fabric grows visibly in your lap. Give yourself an evening with a good film and a warm drink. Your finished hat will be the proof.
Pattern inspiration from krocht.com’s “Crochet Wheat Spike Beanie: A Textured Winter Classic”; tutorial and photos of the beanie by tallermanualperu.
