
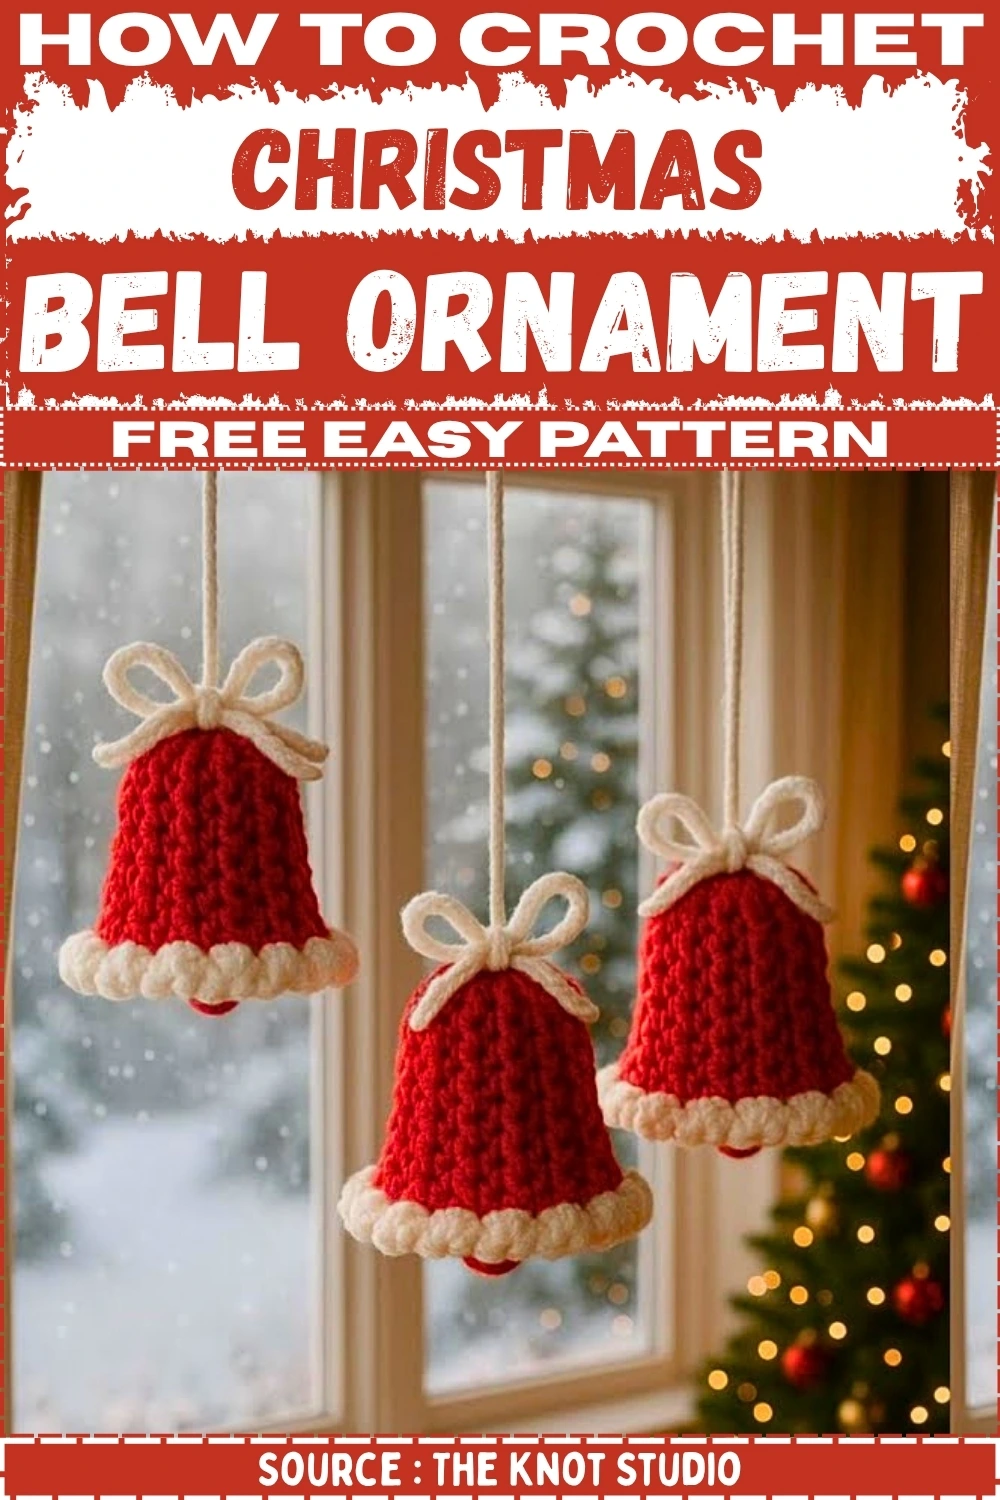
Some ornaments just belong on a Christmas tree, and a little crocheted bell is one of them. This one is a classic: a smooth single-crochet bell worked from the top down, finished with a flared white ruffle that zigzags around the rim and a tiny bead tucked inside as a soft clapper. It is dense enough to hold its shape with no stuffing at all, small enough to finish in about an hour, and it uses nothing but scraps of four-ply cotton.
The whole bell is built in joined rounds, and there is exactly one moment that asks for your attention — Round 14, where the ruffle is worked around the posts of the previous round instead of into the stitch tops. Everything else is plain single crochet, so this is a genuinely beginner-friendly make with a pretty, dimensional finish.
What you’ll need
- 4-ply cotton yarn in a main color for the bell body (red in the finished sample) and white for the ruffle trim and hanging cord
- 2.5 mm to 3 mm crochet hook
- Yarn needle, for weaving in ends and attaching the hanging cord
- Scissors
- Optional: a small pearl bead (or a glass bead) for the clapper inside the bell
- US crochet terms: MR (magic ring), ch (chain), sl st (slip stitch), sc (single crochet), hdc (half double crochet), inc (increase — 2 sc in the same stitch)
Crochet Bell Pattern Free Christmas Ornament With Ruffle Trim
 Save
1. Ruffle-Trim Christmas Bell Ornament
The bell is worked seamlessly from the top down. Rounds 1 to 4 build a flat top: start with 6 sc in a magic ring, then increase evenly — 2 sc in every stitch, then sc-inc repeats — until you have 24 stitches. Rounds 5 to 10 are straight single crochet with no increases, which forms the sides of the bell. In Round 11 you increase again (sc in the next 3 stitches, inc in the fourth, repeated around) to reach 30 stitches, and Round 12 is one plain round before you fasten off the main color.
The trim is where the bell gets its character. For Round 13, join the white yarn at the bottom edge and work one hdc in every stitch. Round 14 is the ruffle: instead of working into the tops of those half double crochets, you work around their posts, turning the edge as you go — 3 sc worked down the post of one hdc, 1 sc at the bottom of the chain space, 3 sc worked up the next post, 1 sc at the top of the space. Each repeat covers two posts, so you work 15 repeats around, and that up-and-down turning is exactly what pulls the trim into its zigzag ruffle. Join, fasten off, and weave the ends in tightly inside the crown so the top stays neat.
To finish, make the hanging cord: chain 40, then slip stitch back along every chain — that second pass firms the cord into a rope-like strand that will not stretch while the ornament hangs. Thread the tail through the top center of the bell from outside to inside twice, pull firmly, knot, and weave the tail through a few inside stitches to lock it before trimming close. If you want a clapper, drop the pearl bead inside before you secure the cord; it rests at the base and gives the bell a soft rattle when the branch moves.
A few variations worth trying: a green body with a red ruffle, gold with white, or blue with a silvery white trim all read beautifully at ornament scale. Chain 60 or 70 instead of 40 if you want the bell to hang lower on the branch, skip Rounds 13 and 14 entirely for a plain minimalist bell, or work three bells in descending sizes (fewer rounds for the smaller ones) and hang them at different lengths from a single cord as a cluster.
Video tutorial: Crochet Bell Ornament for Christmas — full step-by-step video tutorial
Tip: Read the Round 14 description once before you start the ruffle, and take it one post at a time — if the ruffle twists instead of lying flat, you are turning the fabric the wrong direction at one of the posts. Insert the hook from front to back around the vertical body of the stitch, never into the V at the top.
Caring for your bell ornament
- Store it in a lidded box or a zip bag between seasons so the cotton stays dust-free; a quick shake is usually all it needs before hanging.
- If the bell loses its shape in storage, steam it lightly and press it back into shape with your fingers — do not iron it flat.
- Spot-clean only, with a damp cloth; the bell holds its shape from stitch tension alone, so there is no stiffener to protect, but soaking can stretch the hanging cord.
- Check the cord knot once a season and re-seat it if it has worked loose; a stretched cord is a two-minute replacement (chain 40, slip stitch back).
- Keep the bead clapper out of reach of small children and pets if the bead ever works loose.
Pattern and video tutorial by The Knot Studio, via crocheteverything.com — I only wrote this walkthrough; the design belongs to its maker, so please watch their video and give their channel a follow when you make yours. One bell takes about an hour, and they are dangerously moreish: one for the tree, one for the wreath, one for the gift box. Happy stitching!
